Performance testing
The scan time depends heavily on file size, type, and content. To get accurate throughput numbers for your particular workload, we recommend running a performance test:
- Install bucketAV by following the Setup Guide using the default values.
- Install the Scan bucket at regular intervals Add-On.
- Install Add-On
- Set the Stack name to
bucketav-performance-test. - Set the
BucketAVStackNameconfiguration parameter to the stack name of bucketAV (if you followed the docs, the name isbucketav). - Set the
BucketNameconfiguration parameter to the name of an S3 or R2 bucket that contains at least 10,000 files. Keep in mind that infected files will be deleted by default! - Remove the default value from the ScheduleExpression parameter to disable the schedule.
- Set the
PagingBatchSizeconfiguration parameter to1000. - Set the
PagingWaitInSecondsconfiguration parameter to0. - Select I acknowledge that AWS CloudFormation might create IAM resources.
- Click on the Create stack button to save.
- Generate load.
- Visit the AWS Step Functions Management Console.
- Ensure that you are in the correct region.
- Navigate to State machines.
- Click on the
bucketav-performance-test-scan-orchestratorstate machine. - Click the Start execution button.
- Keep the defaults and click the Start execution button.
- Open the dashboard. The Scan Queue tile shows the data of interest. You should see the Queue Length go up.
- Wait another 15 minutes to capture data.
- Reload the dashboard. In the Scan Queue tile, click on the Files processed legend. Now you only see the metric of importance. Zoom into the area of interest. Now you know the number of files scanned per minute (axis on the right). This is the throughput of one
m6i.largeEC2 instance for your workload.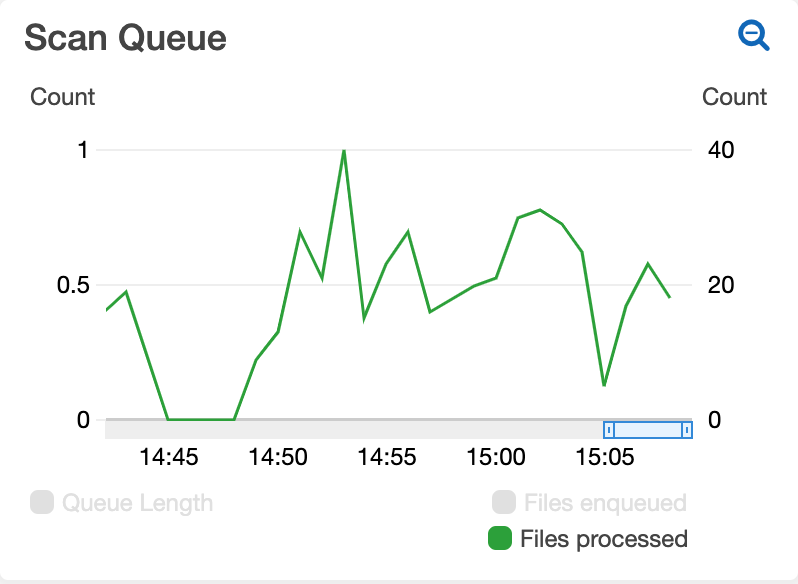
- To clean up, remove the CloudFormation stack named
bucketav-performance-test.