Migration Guide
bucketAV comes in three variants: bucketAV powered by ClamAV®, bucketAV powered by Sophos® and bucketAV powered by multiple engines. You can migrate from one variant to another at anytime without interrupting operations or the need for reconfiguration.
Migration is possible at any time and without downtime.
Migrating from bucketAV powered by ClamAV® to bucketAV powered by Sophos®
To better estimate the costs of bucketAV powered by Sophos®, visit the pricing page and open your dashboard to understand the amount of data scanned.
Start with subscribing to bucketAV powered by Sophos® through the AWS Marketplace.
- Open bucketAV powered by Sophos® in the AWS Marketplace.
- Click the View purchase options button.
- Press the Subscribe button.
- Wait while AWS Marketplace is processing your request.
Do NOT proceed the AWS Marketplace flow by clicking the Launch your software button.
Next, migrate your installation of bucketAV.
- Open the AWS CloudFormation service in the AWS Management Console.
- Double-check, that the correct region is selected (see main navigation top right).
- Navigate to Stacks.
- Click on the bucketAV stack (if you followed the docs, the name is
bucketav). - Click on the Outputs tab.
- The output
Engineshows the current engine of bucketAV. The value should beclamav. In case the outputEngineis not available, you are runningclamavas well. - The output
Versionshows the current version of bucketAV. Remember the value. - The output
FulfillmentOptionshows the fulfillment option. Remember the value.
Afterward, pick the Amazon S3 URL of the matching CloudFormation template from the following table.
In case the current version is
1.x, follow the Migration Steps in the Update Guide first!
You are ready to migrate to bucketAV powered by Sophos®.
- Select the bucketAV stack (e.g.,
bucketav) and press the Update stack button; press Make a direct update.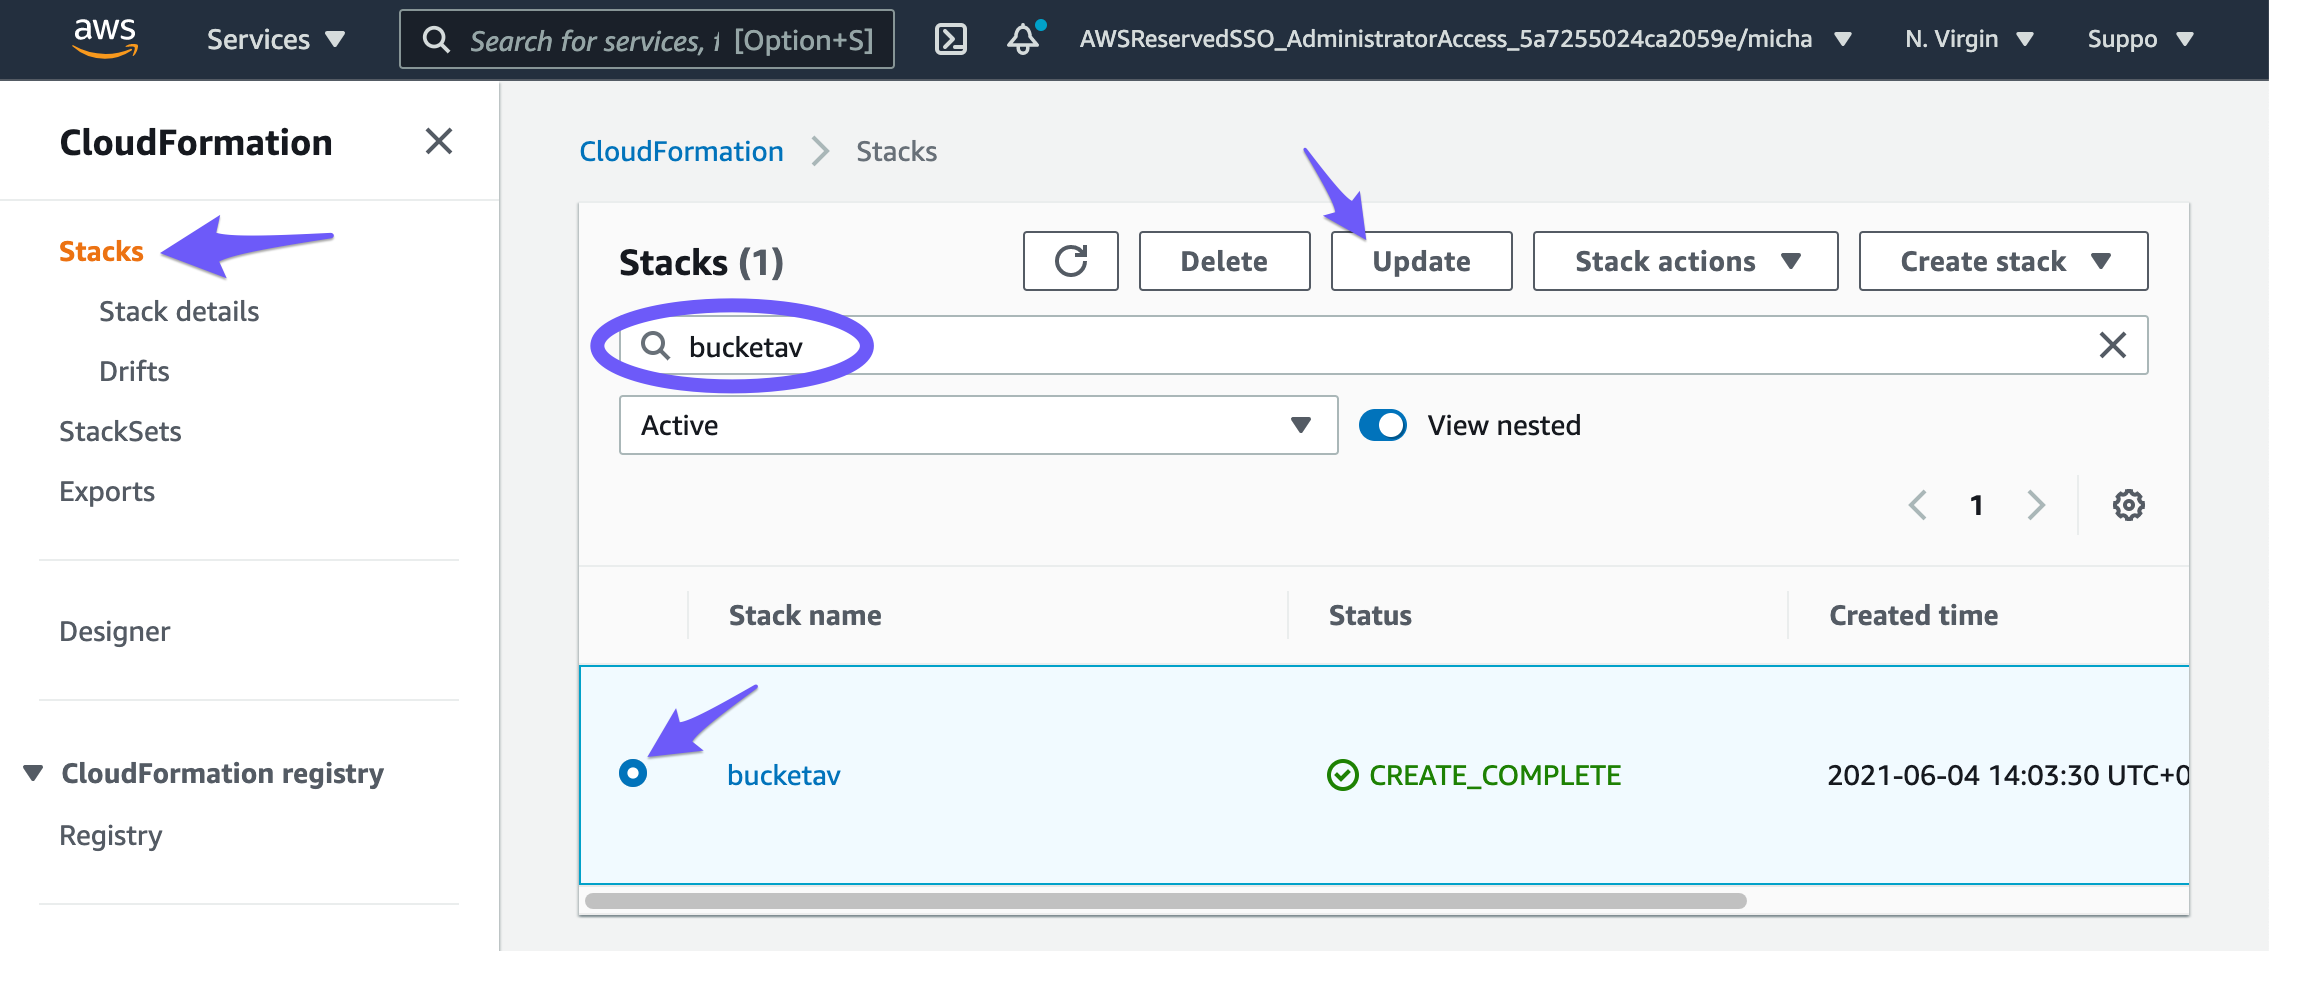
- Select Replace existing template and paste the Amazon S3 URL that you picked above.
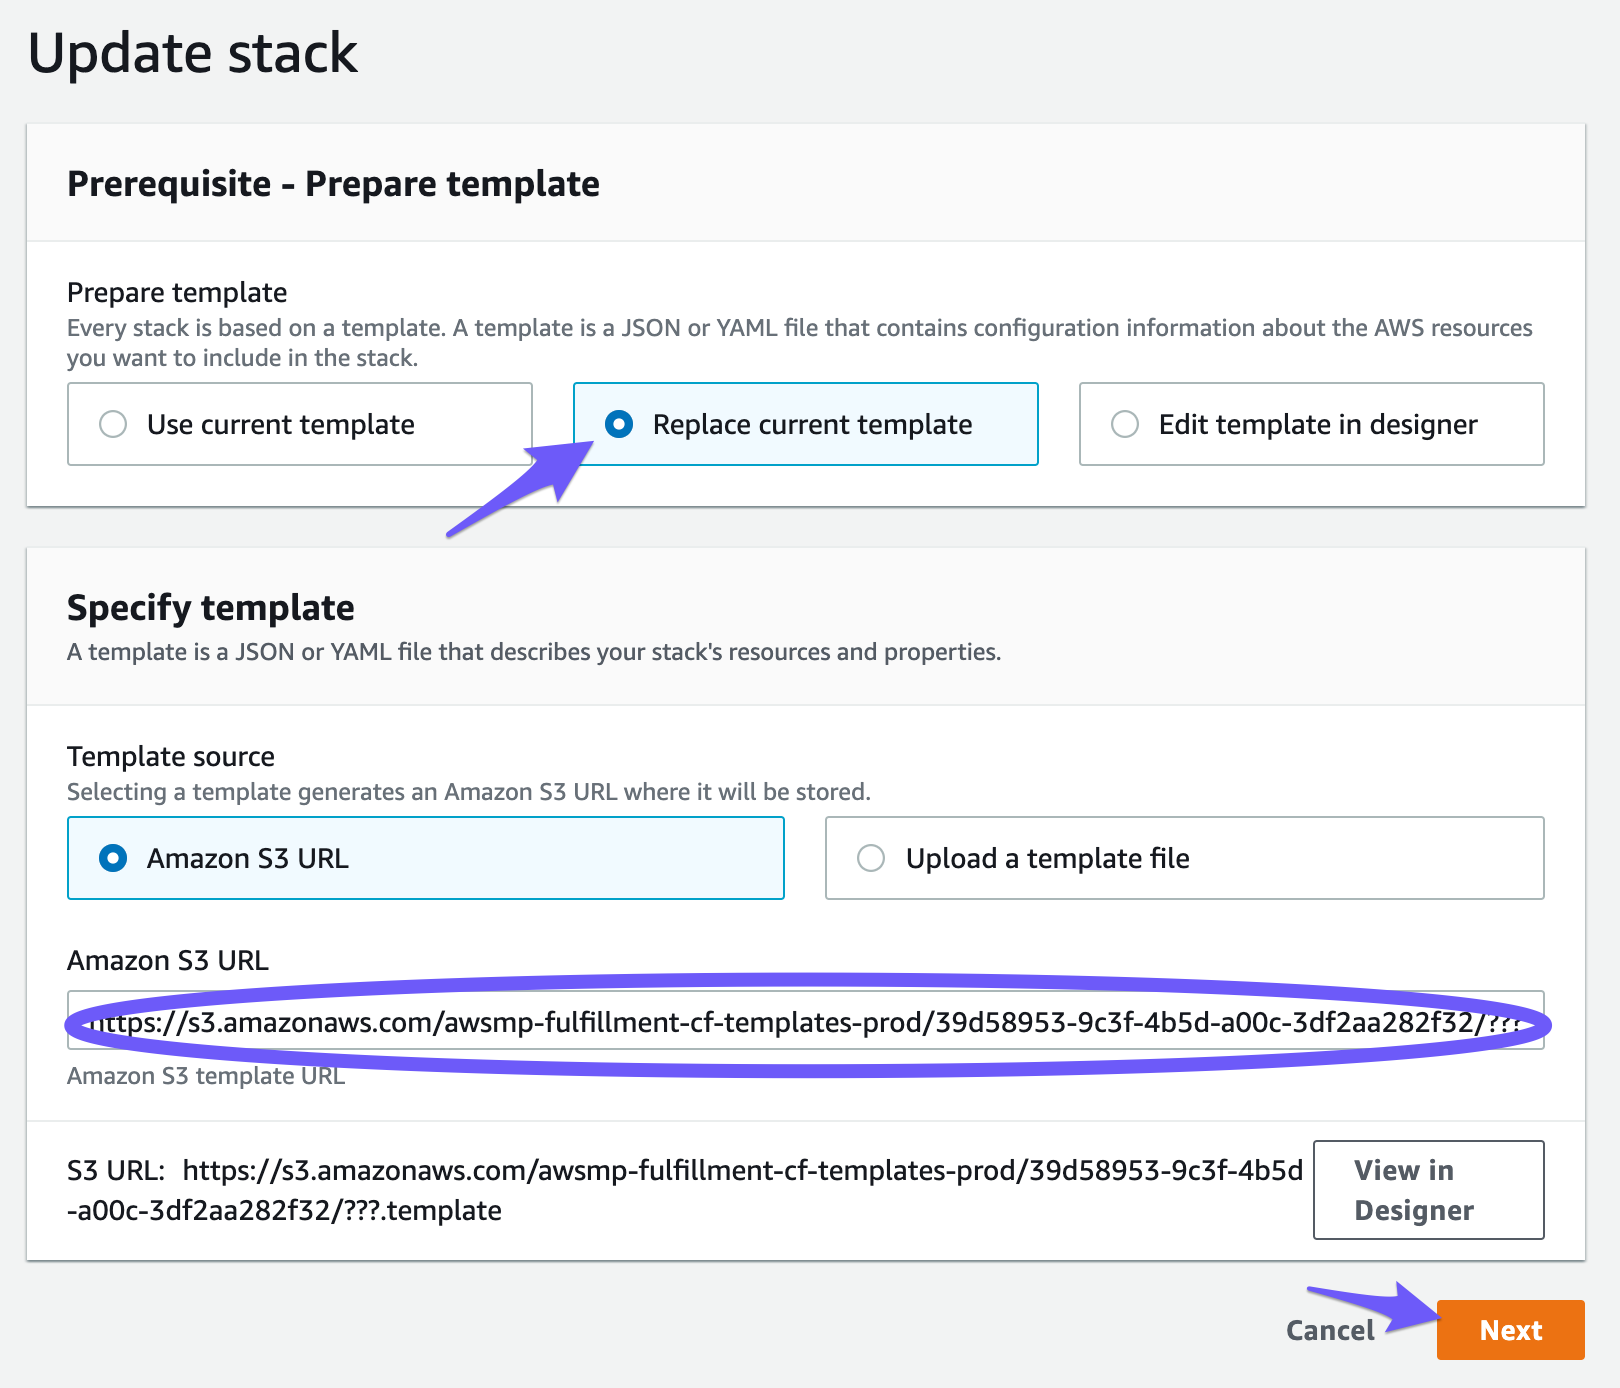
- Click on Next.
- Scroll to the bottom of the page and click on Next.

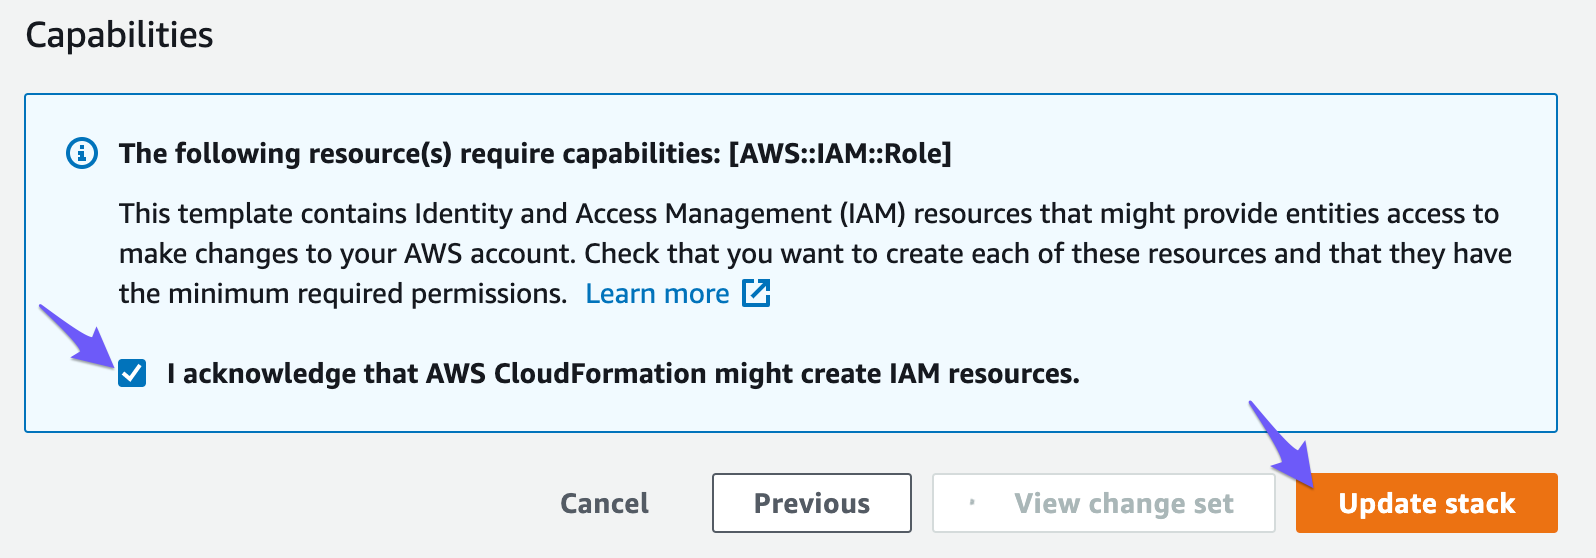
- Scroll to the bottom of the page, enable I acknowledge that AWS CloudFormation might create IAM resources, and click on Next.

- Scroll to the bottom of the page and click on Submit.
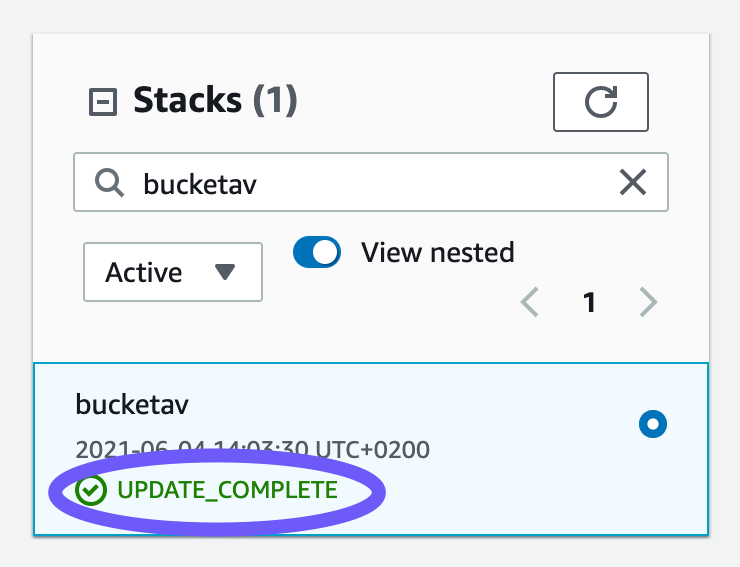
- While the update runs, the stack status is UPDATE_IN_PROGRES. Reload the table from time to time and …
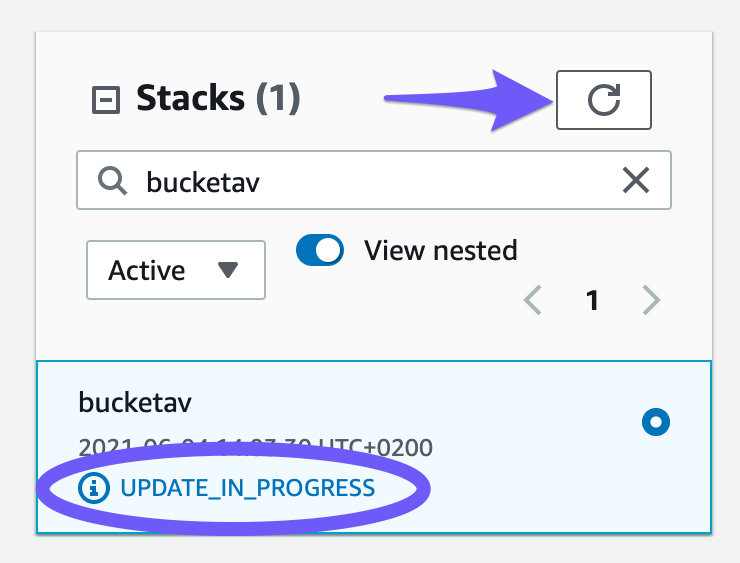
- … wait until the CloudFormation stack status switches to UPDATE_COMPLETE.
You are now running bucketAV powered by Sophos®.
Migrating from bucketAV powered by Sophos® to bucketAV powered by ClamAV®
Start with subscribing to bucketAV powered by ClamAV® through the AWS Marketplace.
- Open bucketAV powered by ClamAV® in the AWS Marketplace.
- Click the View purchase options button.
- Press the Subscribe button.
- Wait while AWS Marketplace is processing your request.
Do NOT proceed the AWS Marketplace flow by clicking the Launch your software button.
Next, migrate your installation of bucketAV.
- Open the AWS CloudFormation service in the AWS Management Console.
- Double-check, that the correct region is selected (see main navigation top right).
- Navigate to Stacks.
- Click on the bucketAV stack (if you followed the docs, the name is
bucketav). - Click on the Outputs tab.
- The output
Engineshows the current engine of bucketAV. The value should besophos. - The output
FulfillmentOptionshows the fulfillment option. Remember the value.
Afterward, pick the Amazon S3 URL of the matching CloudFormation template from the following table.
- Select the bucketAV stack (e.g.,
bucketav) and press the Update stack button; press Make a direct update. - Select Replace existing template and paste the Amazon S3 URL that you picked above.
- Click on Next.
- Scroll to the bottom of the page and click on Next.
- Scroll to the bottom of the page, enable I acknowledge that AWS CloudFormation might create IAM resources, and click on Next.
- Scroll to the bottom of the page and click on Submit.
- While the update runs, the stack status is UPDATE_IN_PROGRES. Reload the table from time to time and …
- … wait until the CloudFormation stack status switches to UPDATE_COMPLETE.
You are now running bucketAV powered by ClamAV®.
Migrating from bucketAV powered by ClamAV® to bucketAV powered by multiple engines
bucketAV powered by multiple engines combines the scan results of the ClamAV® and Sophos® engines into one scan result.
The costs can be calculated by adding the costs for bucketAV powered by Sophos® and bucketAV powered by ClamAV®. Visit the pricing page to learn more.
Start with subscribing to bucketAV powered by Sophos® through the AWS Marketplace.
- Open bucketAV powered by Sophos® in the AWS Marketplace.
- Click the View purchase options button.
- Press the Subscribe button.
- Wait while AWS Marketplace is processing your request.
- Open bucketAV powered by Sophos® in the AWS Marketplace.
- Click the View purchase options button.
- Press the Subscribe button.
- Wait while AWS Marketplace is processing your request.
Do NOT proceed the AWS Marketplace flow by clicking the Launch your software button.
Keep your bucketAV powered by ClamAV® subscription in the AWS Marketplace.
Next, migrate your installation of bucketAV.
- Open the AWS CloudFormation service in the AWS Management Console.
- Double-check, that the correct region is selected (see main navigation top right).
- Navigate to Stacks.
- Click on the bucketAV stack (if you followed the docs, the name is
bucketav). - Click on the Outputs tab.
- The output
Engineshows the current engine of bucketAV. The value should beclamav. - The output
FulfillmentOptionshows the fulfillment option. Remember the value.
Afterward, pick the Amazon S3 URL of the matching CloudFormation template from the following table.
| Fulfillment Option | Amazon S3 URL |
|---|---|
dedicated-public-vpc | https://bucketav-templates.s3.eu-west-1.amazonaws.com/aws/multi/3.0.3/dedicated-public-vpc.yaml Copy |
dedicated-private-vpc | https://bucketav-templates.s3.eu-west-1.amazonaws.com/aws/multi/3.0.3/dedicated-private-vpc.yaml Copy |
shared-vpc | https://bucketav-templates.s3.eu-west-1.amazonaws.com/aws/multi/3.0.3/shared-vpc.yaml Copy |
| Fulfillment Option | Amazon S3 URL |
|---|---|
dedicated-public-vpc | https://bucketav-templates.s3.eu-west-1.amazonaws.com/cloudflare/multi/3.0.1/dedicated-public-vpc.yaml Copy |
dedicated-private-vpc | https://bucketav-templates.s3.eu-west-1.amazonaws.com/cloudflare/multi/3.0.1/dedicated-private-vpc.yaml Copy |
shared-vpc | https://bucketav-templates.s3.eu-west-1.amazonaws.com/cloudflare/multi/3.0.1/shared-vpc.yaml Copy |
You are ready to migrate to bucketAV powered by multiple engines.
- Select the bucketAV stack (e.g.,
bucketav) and press the Update stack button; press Make a direct update. - Select Replace existing template and paste the Amazon S3 URL that you picked above.
- Click on Next.
- Validate all parameters starting with EngineClamAV and EngineSophos.
- Scroll to the bottom of the page and click on Next.
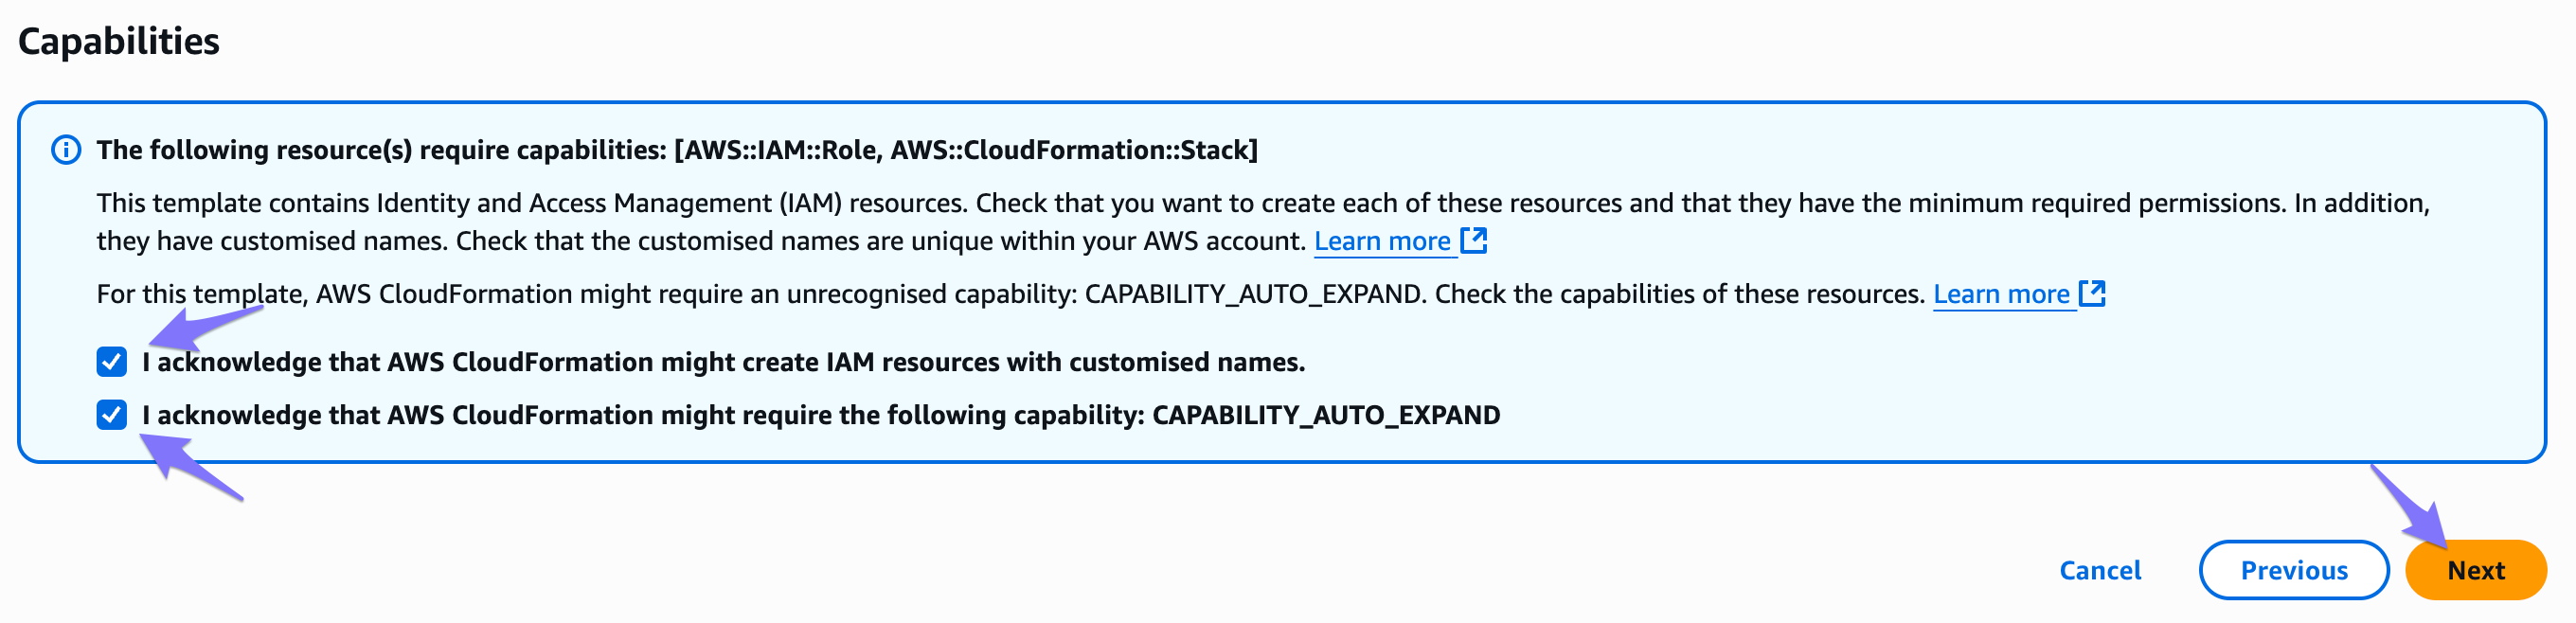
- Scroll to the bottom of the page, enable I acknowledge that AWS CloudFormation might create IAM resources with customised names and I acknowledge that AWS CloudFormation might require the following capability: CAPABILITY_AUTO_EXPAND, and click on Next.
- Scroll to the bottom of the page and click on Submit.
- While the update runs, the stack status is UPDATE_IN_PROGRES. Reload the table from time to time and …
- … wait until the CloudFormation stack status switches to UPDATE_COMPLETE.
You are now running bucketAV powered by multiple engines.
Migrating from bucketAV powered by Sophos® to bucketAV powered by multiple engines
bucketAV powered by multiple engines combines the scan results of the ClamAV® and Sophos® engines into one scan result.
The costs can be calculated by adding the costs for bucketAV powered by Sophos® and bucketAV powered by ClamAV®. Visit the pricing page to learn more.
Start with subscribing to bucketAV powered by ClamAV® through the AWS Marketplace.
- Open bucketAV powered by ClamAV® in the AWS Marketplace.
- Click the View purchase options button.
- Press the Subscribe button.
- Wait while AWS Marketplace is processing your request.
- Open bucketAV powered by ClamAV® in the AWS Marketplace.
- Click the View purchase options button.
- Press the Subscribe button.
- Wait while AWS Marketplace is processing your request.
Do NOT proceed the AWS Marketplace flow by clicking the Launch your software button.
Keep your bucketAV powered by Sophos® subscription in the AWS Marketplace.
Next, migrate your installation of bucketAV.
- Open the AWS CloudFormation service in the AWS Management Console.
- Double-check, that the correct region is selected (see main navigation top right).
- Navigate to Stacks.
- Click on the bucketAV stack (if you followed the docs, the name is
bucketav). - Click on the Outputs tab.
- The output
Engineshows the current engine of bucketAV. The value should besophos. - The output
FulfillmentOptionshows the fulfillment option. Remember the value.
Afterward, pick the Amazon S3 URL of the matching CloudFormation template from the following table.
| Fulfillment Option | Amazon S3 URL |
|---|---|
dedicated-public-vpc | https://bucketav-templates.s3.eu-west-1.amazonaws.com/aws/multi/3.0.3/dedicated-public-vpc.yaml Copy |
dedicated-private-vpc | https://bucketav-templates.s3.eu-west-1.amazonaws.com/aws/multi/3.0.3/dedicated-private-vpc.yaml Copy |
shared-vpc | https://bucketav-templates.s3.eu-west-1.amazonaws.com/aws/multi/3.0.3/shared-vpc.yaml Copy |
| Fulfillment Option | Amazon S3 URL |
|---|---|
dedicated-public-vpc | https://bucketav-templates.s3.eu-west-1.amazonaws.com/cloudflare/multi/3.0.1/dedicated-public-vpc.yaml Copy |
dedicated-private-vpc | https://bucketav-templates.s3.eu-west-1.amazonaws.com/cloudflare/multi/3.0.1/dedicated-private-vpc.yaml Copy |
shared-vpc | https://bucketav-templates.s3.eu-west-1.amazonaws.com/cloudflare/multi/3.0.1/shared-vpc.yaml Copy |
You are ready to migrate to bucketAV powered by multiple engines.
- Select the bucketAV stack (e.g.,
bucketav) and press the Update stack button; press Make a direct update. - Select Replace existing template and paste the Amazon S3 URL that you picked above.
- Click on Next.
- Validate all parameters starting with EngineClamAV and EngineSophos.
- Scroll to the bottom of the page and click on Next.
- Scroll to the bottom of the page, enable I acknowledge that AWS CloudFormation might create IAM resources with customised names and I acknowledge that AWS CloudFormation might require the following capability: CAPABILITY_AUTO_EXPAND, and click on Next.
- Scroll to the bottom of the page and click on Submit.
- While the update runs, the stack status is UPDATE_IN_PROGRES. Reload the table from time to time and …
- … wait until the CloudFormation stack status switches to UPDATE_COMPLETE.
You are now running bucketAV powered by multiple engines.